This fortnight's challenge is a tricky one if like me, you like to add words to your creations, and I nearly always do so.
The
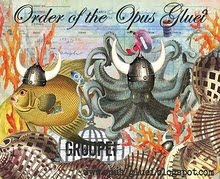
Opus Gluei challenge is to create something without words and let the image speak for itself.
I have created a 5 x 7 inch canvas which hopefully makes you think of summer.
Click on it to make it bigger.
Now you know how it is when you are desperate (oh so desperate) to get hold of a crafty item and then when you finally get it, you sit and sit and can't quite come up with something to make that you know you will actually love and want to put it up on your wall and not just making something for the sake of it, which is quite different.
Well this is what happened to me with the Woodware pack of 12 blank jigsaw puzzles which size at 4 x 51/2 inches, which are great and need NO surface preparation.
But thank goodness a trip around my favourite blogs in blogland took me to the super talented stamper
Willy Anderson and her jigsaw creation in
this post which has inspired my canvas. Thank you Willy!
If you like working with acrylics you may have come across a series of special property gold acrylics that you can either:-
- use on their own,
- over the top of coloured acrylics to add a translucent shimmer (similar effect as watercolour H20's give),
- or mixed into a colour to produce a unique lustrous shimmer to the colour.
I use Golden's Interference Gold (Fine) #4040-4 from series 7
and
Golden's Iridescent Gold (Fine) #4010-4 from Series 6.
(Golden is the company name.)
They give the most amazing shiny effect, I mean really
majestic shiny as oppose to glitter glue shiny.
Don't get me wrong I love my Ranger stickles but these are in a whole 'nother league of shiny.
I'm talking 'bout POSH shiny.
For this project I used Golden Interference Gold (Fine) #4040-4 from series 7
neat (I'm talking hardcore shiny) on a white canvas.
It gives a shimmer so good you could rub your cheek on it and give it a lick, yes truly, it really is that good.
This paint is truelove shiny.
The Woodware jigsaws come in plain white.
I used Chocolate Baroque (formerly Elusive Images) Doodle Birds and Doodle Butterflies collection stamps.
I stamped straight onto the jigsaw firstly the peacock feather with versamark and clear heat embossed it and then stamped the bird (and the butterflies on white card) with Brilliance Ink in Mediterranean Blue and clear heat embossed them.
I used tumbled glass and mustard seed Distress Inks and the applicator tool to apply them.
I liberally used Arctic Frost Glitz Gel (Imagination Crafts) over the stamped images. I spread this gel with a small wet paintbrush which I keep re-wetting, because squeezed neat out of the tube this gel is very thick and looks like kiddy snot combined with rabies froth, sorry but it does and it isn't a good look.
I used white PVA to glue the jigsaw onto the canvas and glue dots for the butterflies.
So do you feel like making a shiny something or a picture that is worth a thousand words?
You have until the 13 August to join in using Mr Linky over
here!
Happy creating!
Gini
xx