Welcome to the land of Shiny


The home of exuberant amateurism.

Saturday 21 November 2009

Keys ATC Nov 2009, The Artist Trading Club

Keys have been a very popular challenge theme in the last few months.
As I have already done Keys for the ABAA challenge in September I tried to think about keys from a different angle.
OK, so what phrases refer to keys.
Key to my heart.
Key to the door. And......

A few days pass and...... Nope, no more ideas were forthcoming.
That is pretty rubbish on the ideas front don't you think?

So I gave that up and went back to rabbits and hidden keys and had a ball dreaming these ones up.

Have you heard about the latest craze that is sweeping the country this Christmas?
Santa's Elves have been working day and night to meet the demand for flying keys and not just any keys; these are magic keys that only rabbits can fly.
Up and down the country hutches and warrens have been buzzing with excitement over the prospect of what will be lurking in Santa's sacks.

Flying Key Fever is making newspaper headlines and causing many mother rabbits considerable anxiety and sleepless nights over potentially limited stock (you didn't really think this was just a human condition did you?).

A fortunate few rabbits are already whizzing around the skies showing off to anyone who will watch them. I was lucky enough to be out with my camera and managed to capture a few of their antics in pixels.


Then I made another butterfly with a key body.


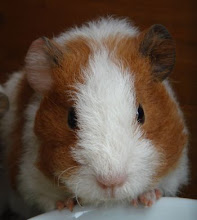
I found an image of a cute red squirrel. I love red squirrels (well just about any animal with fur or feathers really).
So this squirrel called Bob has buried his flying key to wait for the 24th December and hopes to dig it up and sell it for a fortune in nuts to some poor, nearly on the verge of a nervous breakdown, "gotta get a flying key" Rabbit. That is of course if he can find it again.


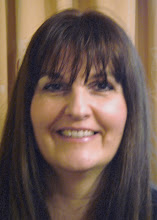
Then I noticed Julia peeping through her keyhole and low and behold Lloyd Grossman's show "Through the keyhole" popped into my head.
Come on all together now "Who lives in a house like this?"

Apparently he puts that accent on, it's not real, so Himself informs me. Now I could understand him doing this if he was a comedian, to give himself a memorable uniqueness, but he's not a comedian, he's a food critic and cook. Just shows you how little I know about the limelight and the media.

Cop a load of how out of focus this picture is, I blame my camera of course, it couldn't possibly have been me.
Oh! and on this one I thought I would finish it off with a blanket stitch border, it was AFTER I had bodged the holes in it that I realised I couldn't actually remember how to do blanket stitch which was so incredibly handy I had to do a little dance.
I got out a sewing book, but the written description of just how to do this stitch might have been written in Swahili for all the sense I could make of it, so I had to wing it and invent a new stitch called the Schmare Stitch.

Named in Tribute to the late great Jack Lemmon for his fantasmagorical performance as Felix Ungar in the Odd Couple and that wonderful scene of him having a sinus attack in the coffee shop - schmaaaare, schm, schm, schmare. (Who needs Meg Ryan doing her "thing" in a coffee shop when we have Jack...)
You can watch this scene on you tube if you like :-)

Presenting the Schmare stitch -
which as you can see is quite badly untidy, but it's a new stitch and I haven't got it polished to perfection yet :-)


I did finally come up with something for "The key to my heart" and took yet another awful picture of it with that temperamental camera of mine, which I think was having it's own sinus attack today.


These two have absolutely nothing to do with this challenge (I could have been just a little bit wicked and just left them here and let you try and decide what they had to do with Keys. The answer of course being absolutely nothing, but I'm good, allegedly, Santa says so and his sacks are very full...)
I did wonder how much of a difference a central image can make to the same background, quite a lot seemingly.


Happy Crafting everyone!
Gini

Last Bad Hair Day ATC for The Artist Trading Club Swap Sept 2009

I was wondering if it was possible to make "shiny grunge" that didn't look like a dogs dinner.

I have no idea who the man in this image portrays but it came from The bumper book of papers from the Crafter's Paper Library, which disappointingly is printed on semi gloss paper which is not what I would've knowingly purchased. Still...

The resemblance of this chap to Billy Connolly is startling don't you think?
Either he is a great great relative of Billy's or he could be The Billy Connolly caught in the Victorian Era and he got there by hitching a ride with Spanky.

I'm not sure if I have managed to achieve a visually pleasing shiny grunge punk mohawk.
I like it, but that might be because I like Billy Connolly :-)

As you know I struggle to photograph shiny well, so the real look of the thing is somewhere in the middle of these two photos.
Click on them to make them bigger.


Happy Crafting everyone!
Gini

Saturday 24 October 2009

Spanky does Zetti Julia

So Spanky wanted to try her hand at Zetti, and I have to say I like Julia better this way, she's a sparkly shimmery hottie now, even if I do say so myself.

Do you think Spanky is the only stylist to use splendid gold rollers when setting hair?
I would image Posh Spice will require them when she reaches a certain age but right now, Julia is one spoilt unique lady.
Most of the time I wouldn't have the brass nerve to go out in public in rollers, but when the wind is in my fur, well anything is possible. :-)

Click on Julia to make her bigger. I don't think I would use this phrase if Julia was Julian.


How Spanky made her

Once again out came some DCWV Pocket full of Posies card for the background and all the extra bits. I cut out some patterned blue circles from another sheet of the same pack of card. I used Sakura stardust clear pen to add lots of sparkle to things. I also used a mini butterfly punch to punch out the mauve butterflies of yet another sheet.
I edged as much as I could with a white gelly pen to tie everything in together. I used DecoArt Rich Expresso metallic acrylic to paint her hair and then painted Splendid Gold (what a brilliant name) curls.
Her crown is a green size Woodware punch and edged in white gelly pen.
I drew her dress on watercolour card. Cut it out. Painted it acrylic Viridian Hue (which is a lovely mid green blue colour.)
Painted Ice Blue Glitz-it glitter glue over the top. For large areas I prefer using the big bottles of Glitz-it glue either by squeezing it out thick straight from the bottle (watercolour card is firm enough to cope with this) or by spreading it around with an old nylon bristle brush that I wash out straight away afterwards with washing up liquid. For little glitter details, blobs and thin lines you can't beat Ranger Stickles.
If you spread the glitter glue with a paint brush you don't get such a dense amount of glitter and you can therefore change the shade of the glitter glue by painting the background in different acrylic colours. (Watercolours won't work because the glue contains water that will reactivated the paint and smear it about unevenly, unless that is the effect you want.) You can achieve endless combinations of glitter colours this way with the same bottle of glitter glue.
I used a heart punch to decorate her dress, again white edging around each heart. Do the edging before you stick them on the picture. I used various round "jewels" stuck on with white PVA.
The black and white border is a black fine point Sharpie and white acrylic paint applied with a straight edge shader no. 3 paint brush. A straight edge shader brush gives you a straight line without even trying. A no. 4 works as well.
Julia's legs and arms are bugle beads. Thread them on some sewing cotton, lay a thin line of Anita's 3D Clear Gloss down and then lay the line of bugle beads on the top. Straighten the line up with two cocktails sticks one on either side of the line then remove the sticks. After a minute or two carefully pull the sewing thread out of the bugle beads and voila, sparkly limbs!
I ummed and ahhed whether or not to colour her face with make up, and chickened out in the end with the fear of spoiling the picture. I think I quite like the contrast.

I still find the massive head a bit creepy, but the shiny certainly lessens the squick factor a bit for me.

Happy Crafting everyone!

Gini

Friday 9 October 2009

Opus Gluei Challenge #27 Copy Cat

Well I've chosen Zetti style for my Copy Cat for the Opus Gluei challenge this week.

I've been too scared to try Zetti before, mainly because I get so upset when I mess up on a project. You don't get to sketch with pencil 'til you get it right; you just pick up a pen and go for it. {{{shudder}}}
You know when you "add" a bit extra or try something a bit different and then you want to cry 'cos you just ruined it!!!
And you have to go to bed to recover even if it's 10 in the morning and chocolate won't make it better. (Maybe some Nice n Spicy Nik Nak's when you get up though...)

But do you know what? I don't think you can mess up with this style, as it seems anything goes, and if in doubt, you just add some more to it, how excellent is that!

My internet connection was down when I was working on this so I wasn't able to research it and had to rely on my memory (Never a good idea).

What I could remember was lots of stripes particularly black and white, in borders and arms and legs, lots of doodling, people completely out of proportion in their bodies, lots of strange parts added to their bodies. I couldn't remember seeing any shiny, but overlooked that fact because Shiny Zetti works much better for me! Now that I've googled "Zettiology", I'm glad I didn't have the internet doing this, as I'd have been overwhelmed and probably stalled again.

Click on the image to make it bigger.


How I made her

She's a A6 card (roughly 6x4")

Background paper DCWV Pocket full of Posies 12" card stuck onto card with double sided tape.

The black marker is a fine tip Sharpie, which has me very impressed with it.
The white is white acrylic paint and also White Gelly Roll pen by Sakura or SourKraut if you can't remember but still need to have a stab at the name regardless :-)
The rest is Sakura Stardust pens which are great but the ink comes out quite fast so you can't hesitate or muck about dithering.
The finer flow Asda gelpens allow you to dither as much as you like. 25 for £2. I think you could buy three quarters of a Sakura pen for that money but I like having both :-)
I'm pretty sure I bought my posh work shoes in the sales and topped up on Sakura pens with the money saved. Maybe a similar justification will ease your conscience too?

The lovely lady is Julia, a Cherry Pie Stamp from the Julia Plate.
In this picture she is looking more like Nora Batty but Nora wore American Tan wrinkled round the ankles tights and my Julia is posh with her trendy stripy stockings.

Although I do think patterned tights looked horrible in the '80s and they look horrible in the 00's as well!
I'm too tall for tights, unless I fancy wearing the crotch around my knees, so in the '80s I wore stockings, but not being a morning person I would often go to work in mis matching stockings, and it wasn't just that the patterns were different, sometimes the colours were as well. Too much information? Probably.
Sheesh why can't fashion be flattering to a person?
Have they learned nothing from Spanky ;-)

Happy Crafting Everyone!
Gini
xx

P.S. I no longer do Fashion, I now do Comfy - but don't tell Spanky.

Wednesday 7 October 2009

Opus Gluei Challenge #26 Bling it on...

How could I possibly resist this challenge, everything I make could be entered here, apart from my last post in which I tried to make something without shiny, but couldn't quite manage it. :-)

So I have made the lady with no name and no story (gasp), she was stubbornly silent about herself, which I can only presume is because I was making her especially for a friend and I think she must be saving up her story for her predestined human and her new home!

Without flash so the detail can be seen.
Click on her images to make her bigger.


With flash so the shiny can be seen.


I made her in much the same way as Hoity Toity Kiora.


Happy Crafting Everyone!
Gini
xx

Saturday 3 October 2009

ABAA Challenge: Keys. September 2009. Cornflake Girl. Rabbit where'd ya put the keys girl?

The key thing is......... can you yodel as well as Tori Amos??

You mustn't sing this lyric, to get the full benefit of it you must yodel it with feeling.
Don't fret yourself now, as I promise, you will undoubtedly yodel better than me.

I love this song; Cornflake Girl by Tori Amos.
Especially once I had got over the whole "but, but she's doing Kate Bush, no, no! it's a KATE BUSH rip off" and then had a lie down in a darkened room for a little bit. :-)

I've wanted to do a picture based on this lyric for a good while now.
In preparation for this post I looked up the song lyrics on the web as they made absolutely no sense at all to me, even though I am word perfect in yodeling along; but of course.
I was still none the wiser having read and re read them.
Himself happened to mooch by, as is his way, and said "Oh that, she's talking about changing kiddy gangs in her childhood."
Cue the tumble weed rolling across my craft room floor (well, dining room really).
Yes! You're right my face did look just like that!
Then he smirked and admitted that he had read that somewhere.
Men gotta luv 'em. *cough*


This is a 12 x 12" picture. Click on it to make it bigger.


Can you find the two keys?


How I made it.


The background paper is one from DCWV Old World stack. Edged in brown chalk ink.
I used double sided tape (the strong bond one with the red backing) to stick the background paper to the cardboard.

I used the gorgeous My Mind's Eye 6x6" Bloom and Grow papers to make the trees that I drew.
The trunks are stuck to the foliage with white PVA.
Everything is stuck on the background with foam pads.

The big butterfly is a Debbie Moore clear stamp from a set of butterfly stamps which I think are rubbish quality (they are sticky as hell, rubbing over with a soft rubber doesn't help all that much and some of the stamps are uneven in thickness so it's almost impossible to get an even stamped image) however, the images are really nice which makes the quality issues such a shame. I stamped onto a DCWV pocket full of posies card. I used versafine vintage sepia ink to stamp the image and am so impressed with this ink pad, it's mighty fine to use. I stuck some gold bling gems on the wings with white PVA. The key is grungeboard (courtesy of the lovely ABAA Linda) and I painted it with Dark Bronze Cosmic shimmer watercolour paint. I had to have a little bit of shiny somewhere, I was getting the shiny withdrawal shakes really bad by this point.

The key in the tree trunk was painted with acrylics mixed up to match the patterned paper.

The little butterflies in the trees were some white embossed butterfly embellishments that came free with a cardmaking magazine. I painted them with cosmic shimmer in Dark Bronze, Tropic Yellow and Twinkling H20 Indian Copper. I tried to get the look of our British woodland butterflies.

Isn't the rabbit adorable? She is a Jo Kill design that she made for Papercraft Inspirations magazine Oct 2009, page 45 called Autumn Card Toppers. She designs wonderful animal cards and has done some fabulous ones throughout this year in the magazine.

I used some shiny embossed papers for the rabbit. There isn't a template for her in the magazine, the idea is that you use different sized round hole punches that of course I don't have.
But I made a set of circle templates out of 300g watercolour paper using a set of compasses. The trick to using a pair of compasses is firstly that your pencil is very sharp. You turn the paper not the compass to make the circle. If you want a very small circle you line the nib of the pencil up with the compass point so the pencil is shorter than the compass point. For a large circle line the pencil nib up so that it hangs lower (longer) than the compass point.
To cut without little jags, you never let the blades of the scissors cut right to the end of the blades. X-cut make scissors that deliberately won't cut to the end of the blades, so you can't do it by accident. Good on X-cut! And turn the paper not your scissors.
Thankfully I do have the right size circle punches for the eyes because cutting circles accurately that small would be torture.

The words are stamped by the individual wooden alphabet stamps made by Studio G which are excellent. I recently bought the same alphabet letters in clear stamps from Studio G which I think are awful, I can't get a decent stamp out of them not even after rubbing a soft rubber over the surface and then inking (I tried various different ink pads as well) which usually works with most clear stamps.
If I think it's rubbish I'm going to say I think it's rubbish, and yes I probably do sound a bit belligerent about this today but if your going to shell out good money for something then an honest review is surely a necessity, isn't it?

Happy crafting!
Gini

Saturday 12 September 2009

Spanky does Jonathan Dodgson Carr in 1895. ATC Bad Hair Day.

We are each responsible for our own happiness aren't we?
Well, I nearly peed myself laughing making this one.
(I don't think I should be admitting this but hey.)

I saw on The Artist Trading Club blog that September's theme is Bad Hair Day.
Spanky's eyes lit up and she wanted to have a go.

We (?) were eating lunch of crackers and cheese.
She held the knife and I held the fork. (Run Away Now)
We got to looking at the box of crackers again with a crafter's eye this time.

This is what we were eating.
Click on the pictures to make them bigger.


If you can't read it from the picture, it's my photography skills not your eyes, (your age is just fine, honestly)

It says:-

"Biscuits of Distinction
Carr's Table Water in their original form first appeared in the late 19th Century as a refinement of the ships biscuit. Water instead of fat was used to blend the dry ingredients in order to keep the biscuits fresh on long voyages. Carr's cabin biscuits with their delicate, crisp texture proved extremely popular with seafarers....."

Seeing as we had polished off the packet I cut up the box and Spanky made this.
Click it to make it bigger.


It says:-

Spanky does Jonathan Dodgson Carr in 1895

Mr Carr Esq was not a happy chappy, he asked for a light trim and got... well he didn't know quite what it was, but it was not good.

On his way home the seagulls had dive bombed his monstrous hair but after glumly staring at his reflection in the mirror he had the most marvellous idea!

"I know" he thought "I'll use water instead of fat in ships biscuits and rename them Carr's Table Water, biscuits of Distinction."

Disclaimer. Please note: This story is based on absolutely no facts whatsoever apart from J.D.Carr establishing the Carr's Table Water. The rest is just the product of an over active imagination.

It's one of those conundrum things, if Carr hadn't invented the biscuit then Spanky being a time traveller couldn't have taken them back in time to him, but if Spanky hadn't gone back in time and put biscuits on his head, would Carr have invented the biscuit???
It's all complete tosh of course but it entertained me no end!


But I don't think I can bear to part with it. I think I need to make a set of these.
Actually I might be getting a bit ahead of myself, I haven't even asked if I can join in yet. Oya!

How I made it.

Brayered Andirondack inks in pool and sunset orange on white card. Stamped circles in watermelon and a rubbish white ink from ink it up that hardly had any ink in it and went straight in the bin, what a waste of money.

I use 230 g/m Watercolour paper for any shapes that I stick onto projects. In this case his body and his hair. I find that watercolour paper can handle any applied medium and at this thickness I get rigidity but I'm still able to cut it into intricate shapes quite easily. The 300 g/m (thicker) watercolour paper is better as a background for much larger projects.

Buying watercolour paper. For this sort of thing you don't need expensive brands of paper.
I get 18 sheets of A3 in a pad from "The Works" for £4. It's made by Boldmere.

I painted his water biscuit hair in acrylics. His body in blue metallic acrylic and heat embossed a stamped image in glitter gold on his coat. I edged the piece in eggplant in Versamagic chalk ink.
I glued everything with white PVA.

Happy crafting everyone!

Thursday 10 September 2009

ABAA A story in a box. Challenge September 2009. Incey Wincey Spider.

It was foolish of me to say to Linda that if she did a Spider challenge I couldn't wouldn't play.
Now I should know better than to say things like that, because I'm contrary enough to prove myself wrong.
Thankfully common sense can prevail with me, like when I gracefully declined to take up the dare to grow a willy.

I have arachnophobia that varies in intensity depending on how many big uns I've seen lately and also how much therapy (I use the term loosely) I have had recently.

When this challenge was posted I thought "oh good just my cup of tea"
as I see a story in every piece of art whether it wants one or not.

Then, when I started thinking about it, I thought I would do one of my favourite books "The Little Prince" by Antoine De Saint-Exupery. A marvellous heart warming, heart wrenching then heart warming again book . He also did the loveliest illustrations for it.
I saw a secret or featured e mail, can't remember which now, on post secret where someone said they had had a very expensive school and university education but everything worth knowing they learnt from reading "The Little Prince".

But Mary, Mary quite contrary was saying do a spider in a box.

So I ignored her and carried on with planning The Little Prince and thinking that alternatively I could do another favourite "Welcome to Temptation" by Jennifer Crusie, although I have already done this one as a postcard so it wouldn't really be a challenge.

Mary Mary by this time was getting louder, do a spider in a very small box, because small is hard for you, a spider, a spider in a matchbox, do it, do it!

So the next three weeks past.
The Little Prince VS Spider in a Matchbox, and I had not even picked up the glitter glue to make a start.

Then one morning I woke up and thought OK the only spider I can do has to be very small and shiny. So Incey Wincey Spider came into being.

Click on the pictures to make then bigger.

This is the fit in your pocket matchbox which makes ATC's look enormous.
This is the front and inside the drawer.


In the Land of Shiny even drainpipes sparkle!

On the back I wrote the verse.


I put a brad through the end of the draw and turned the pronged bits over making sure I left a space between the head of the brad and the edge of the drawer so fingernails can grip and pull the drawer open. To keep the brad in that standing proud position I used my favourite welding glue Anita's 3D clear gloss finish to hold the bent brad prongs in place on the inside of the drawer. Then I stuck a panel of card over the top of the glued prongs with double sided tape.


Making spiders cute and sparkly has taught me that even ones worst nightmares can be made shiny. So I wrote on the bottom of the drawer "All fears can be made shiny".


How I made it.
I used the matchbox itself as a template to draw out each flat side. I didn't fold around any sides with card, each side had it's own rectangle of card.
(I do have other papers but can't get enough of this DCWV Pocket full of Posies card.)
For sticking inside the drawer I used double sided tape. Decorate the inside card before assembling.
The outside pieces I glued with white PVA, because it dries slowly it gives plenty of time to slide each card panel into just the right place. Golden gel medium would have dried quicker but once it's positioned it won't budge, so there is no room for fine adjustments.
The two long outside edges and the outside bottom of the draw I painted with metallic acrylics.

Happy crafting everyone!

Edited to add:-

Linda's post told the sad story of Pia de Tolomei.

Linda said "Pia de' Tolomei who had been imprisoned in a fortress in Maremma (Tuscany).
Ghino has fallen in love with Pia, wife of his cousin Nello. When she refuses his love, in revenge Ghino informs Nello that he has discovered a secret message proving that Pia is having an adulterous relationship. This is untrue but Nello imprisons his wife and leaves her to die. "


I don't like sad endings so I'm changing it.

Send Nello my way and I'll glitter glue him into submission and sense. If he proves recalcitrant I will bring out the big guns in the form of embossing powders and "The Heat Tool".
The shiny way will prevail.
(Oh the irony - I'll torture you into a shiny happy person!)
Once he has seen the shiny light he can go rescue Pia and spend the rest of his life making it up to her in many romantic and ever increasingly inventive and novel ways.
Ghino can stand in the corner facing the wall for a very long time, we'll let Pia decide when he can come out of the corner.
Ghino having had plenty of time to reflect on the error of his ways made reparation for his cruelty by becoming a highly successful and adept matchmaker. The world is now full of happy couples who all have a little shrine on their mantelpiece dedicated to Ghino the Marvelous Matchmaker.
And they all lived happily ever after.
## Ta Da ##
Shiny happy ending :-)

Epilogue
The fortress in Maremma has been transformed and is now a remarkably popular crafting retreat. The tower in which Pia was held is now used as a wailing arena where everyone can vent their crafting and glueing woes.

Sunday 6 September 2009

Gimme 5, Order of the Opus Gluei Challenge 22

This is my first time entering this challenge.
I met Rosemary through the Awfully Big Adventure Challenges and I have been admiring her and Jana's horns....the Viking Helmet Horns.

When I started this type of crafting last November I was obsessed with glue. For the first 6 months I was convinced that with the right glue I could make ANYTHING.
I don't think I was as delusional as to think I could cure cancer with the right glue but it was close run thing for a while. Maybe world peace...

I have had a long and arduous battle with the need to glue a project so that it can safely bare the weight of an elephant for 30 minutes otherwise it might fall apart within a week and be NO GOOD.
I am now at the point where I will be happy if my glueing can bare the weight of a baboon for 5 minutes. (Just baby steps, slow but sure baby steps.)
Speaking of steps, I would imagine that there is a 12 step plan for glueing addictions, there seems to be one for just about everything else.

I am happy to make the Opus Gluei Oath.
After finishing these ATC's I inexplicably had orange on the sleeve of my cardigan, now I am sure I didn't actually use anything orange in making them, in fact I can assure you that no orange was harmed in the making of these ATC's.
But the orange was there none the less.

However, I don't think I can eat glue.
I did get a bit lustful for the golden gel mediums that everybody in crafting blogland raves about.
(Strangely, no one cares about them in book reading blogland. I mean one day it could make the difference between the life and death of a well loved and over read book.
Favourite shiny book in your hand OR pages blowing hither and thither with the last page MISSING - gasp.)

I now have the golden gel mediums, they ARE very good, but hand on heart I've never been tempted to taste them. I probably could be persuaded if the glue were teemed with Nutella and I hadn't had chocolate in a while (two days).
Fortunately chocolate is at every turn in the land of Shiny along with just the right glue for the job.
What a difference a year can make.

I was planning on making 5 ATC's (honestly!) so I did 8 backgrounds on the basis that I would probably want to bin 3 of them. I didn't reject any of them and was on a roll, got in a muddle with the counting of them, (well I HAD nearly run out of fingers) and ended up with a series of 7, with 8 ATC's in it.
Then ATC number 6 of 7 started out as 3 of 7, but there was already a 3 of 7 so I crossed that out and made it a 4 of 7, then realised that there was already a 4 of 7, by this time my brain cell had caught up with my hand and I checked to see if there was already 5 of 7 which there was so it became 6 of 7. Are you confused yet? Because I certainly was.

So I am mistakenly giving you 8 Angel ATC's instead of 5, but it's not for the want of trying I can assure you. (I think it was the hidden orange that tipped the balance between a normal challenge entry and this rambling madness.)

Trying valiantly to regain control of this post.

"In the arms of an angel fly away from here.
You're in the arms of an angel.
May you find some comfort there."

Excerpt of some of the lyrics from Angel by Sarah McLachlan.

I heard my new favourite Angel quote recently.

"Angels have no philosophy but love."

The lovely Linda used it in her gorgeous fabric book collaboration.
If you haven't visited Linda's blog before, grab a coffee because you'll get lost in her passionate and joyful celebration of colours and textures. She mixes her media like nobody else and makes all those different art mediums sing Hallelujah together - just dazzling!

Click on the images to make them bigger.


Left side 7 of 7. Right side 8 of 7 Traded. This background was painted with that most under rated artists tool, my finger (No you can't borrow mine, use your own).
I was in fact Gold Finger for a while, James Bond had his eye on me. If the film was being remade in the land of Shiny, the dead lady would not be painted all over in gold (what everywhere??) but would be heat embossed in gold (ouch). What a difference a few decades can make.


Left side 6 (yes) of 7. Right side 2 of 7.


Left side 4 of 7. Right side 3 of 7. She's not that bubbly in real life, what is it with cameras?


Left side 5 of 7. Right side 1 0f 7 Traded. I brain farted with this one and forgot not to make this dimensional, so the little cherubs are mounted on foam and look great standing proud but they might not fit very well in those ATC clear wallet holders. I did back them onto card first so they are not floppy cherubs (phew). I'm nearly sure I prefer them without the stars on them. But I thought they might be thought a bit plain. I was not particularly happy with the stars until I edged them in Sakura stardust pens.


Some weird physics laws must have come into play with the backgrounds because I used metallic acrylic paints. Well I haven't got a cuttlebug or similar so can't emboss paper, so used a textured wrapping paper that whilst not a foil is a plastic coated super shiny paper.
Look.


The acrylics blended completely differently from normal on this paper. The purple one one the left is how the acrylics blended on that paper and the purple, red and gold below it is applied in exactly the same way on plain paper.
Weird.
The greens on the upper right is on the shiny paper and the bottom right shows just how each colour doesn't show up distinctly on top of each other on plain paper, whereas they do on the shiny paper. I even tried putting gesso on top of the shiny paper to see how the paint blended then. It blended just the same as on the shiny paper. I don't understand.
If one has the urge; unfortunately by using a fingernail the acrylics will scratch off the shiny paper; fortunately one just has to control those urges.
(Ha, now I've done it. That's like saying "No, please don't look"...)


All of these ATC's are up for trade.
(Which is why I've made the song and dance about labelling each one.)

Either leave me a comment or e mail me :-)


Happy Crafting everyone!

Saturday 22 August 2009

ABAA Challenge Aug 2009 - A Bird in Hand? Spanky does Mrs Pippy

(This is the Big Posh Bird in Hand project that wasn't ready in time.)


During the "Ask Spanky" coffee morning held at Ferdinand's Flotsam and Jetsam Emporium earlier this month, Mrs Pippy piped up and asked

"Hi Spanky, My sister Buffy and I are identical. I need some individuality, can you help me?"


Mrs Pippy is the Buff Rock Bantam on the left.


Spanky says:

"A bird in your hand is just a bird,
but six in your hair is a masterpiece."


Click on the pictures to make them bigger.


It is so hard to get a good shot of shinyness with a camera (well I can't do it). The background is loud gold and silver and the headdress is edged with shiny bronze but I can't get it to show up without making the rest of it look like smare.

This is the best I could manage for shinyness (Sorry Spanky, don't sulk) -


But with messing with the colours it could look like this:-


My youngest son says that he can tell which hen has laid each egg by the egg's smell.
Amazing huh? (That's ma boy!)
Alas, along with most everyone else, I don't have this talent (perhaps it is a gift that skips a generation?) .
So Spanky bless her, has fixed it that every human bean can tell which eggs Mrs Pippy has laid.


A funny thing happened on the way to Sylvia's blog.

Well, not exactly on the way there, more once I'd arrived, but that would have messed up the play on words of the post title with the film. In fact the post should probably be called
" Husbands - gotta luv 'em!"
Anyway...

I went to Sylvia's blog to say thank you for this lovely award


and noticed that visitors were writing in rhyming verse, and seeing as I excel in this art form *cough* I thought I would have a go.

This is how it went:-

Day 1 post:

Sylvia how do you do?
I am a very happy moo!
Thank you for my friend award,
I'll keep it on my ship aboard,
You may now call me "Mi'Lord",
I'm nothing if not untoward...

It could have been worse, the second line could have been "I am a very happy poo!"
Well - I'm rubbish at rhyming poems as you can tell.
My award is very lovely and you are very sweet to give it to me :-)
thank you very much
Gini xx

Day 2 post:

OK, Himself saw my drafting of your poem on a scrap piece of paper, he said it was awful, (which it was, I freely admit I can't do rhyming) so he drafted this instead, in about 3 seconds flat. Now I can look at this two ways:

1. I could think "Show off, show off, pick your nose and blow off" if I was very childish, which of course I'm not :-)

OR

2. I could think "Aren't I lucky to have such a talented husband" and do the self congratulating thingy and go get him to earn some extra money writing verse for cards, the extra 50p will come in very handy.

Verse take 2 courtesy of Himself:

Sylvia what a lovely thing
that you have done for me
Thank you for my friend award
I'm happy as can be.

I've put it up on my blog
So everyone can see
That you are kind and thoughtful
and a good friend to me.

Aaaah it's so much better second time around!!
Gini
xx

Tuesday 11 August 2009

ABAA A bird in hand? Challenge August 2009. ATC We clad ourselves with false colours

I really didn't want to miss the challenge this month but had resigned myself to the fact that I would because my project is big (A3 size), she's posh and she's only half finished. She also wouldn't take kindly to being rushed. So I'll post her later in the month when she is ready and I have more time.

But then the lovely Sylvia sent me a book on making ATC's, showing ones with flaps and windows and hidden bits of loveliness and it set my brain cell whirling.
Also the delightful owl stamp that came free with the July 09 edition of Craft Stamper magazine has been sitting on my desk hooting "use me, use me". And then a phrase from the book 44 Scotland Street by Alexander McCall Smith has been buzzing around in my head, so I've put them altogether tonight in a little ATC.
If you've never read Alexander McCall Smith before he has a deft and sensitive understanding of human relationships and is well worth trying. He's also written lots of books to choose from!


We've all done this at one time or another haven't we?
Trying to fit in or trying to stand out or trying to banish loneliness.
I like him best in his real colours, I think we all shine best in our real colours, whatever they may be.

I hope I'm not too late for the deadline.
:-) This is my best shiny side smile Linda and Rosie!

Will finish visiting everyone this week, look forward to seeing you all.

Wednesday 29 July 2009

Blog award from Kimmie


The lovely Kimmie gave me this award and I'm chuffed to bits.
You can find her fabulous life and words blog here
and her art blog here

I have found that life is so much easier to get through if you can look at it from an angle.
You just tilt your body a little bit, until your start laughing.

Sunday 19 July 2009

Bubbly Fun Challenge #5. From your garden. The Roly Poly Bird goes a Courting.

I saw on Karen's blog that she was hosting this challenge for Bubbly Scrumptious Blog/website and I love the little nesting bird she made for her entry, it is here


As I had been wanting to make a Roly Poly Bird for ages I thought he could try and win her heart and entry to her nest with a little bit of helpful Shiny magic.


The Roly Poly Bird is the hero from the book "The Twits" by Roald Dahl and in my copy Quentin Blake illustrates him like this:


I thought he would look great transformed into colour using some pretty papers.
Here he is bearing his courting gift. (Click on him to make him bigger.)


So has he got what it takes?

1. Does he have Good looks?

Well, Roald Dahl describes him as "a truly magnificent bird... with marvellous coloured feathers".
In his present incarnation he has plumage made of the DCWV Pocket full of Posies outstanding paper collection. So I think he's looking good, but will she think so too....


2. Does he have a worthy enough character to get a foot in the nest?

Well, in the book he has plenty of heroic characteristics. He found the key to let the monkeys free and worked to the point of exhaustion "he was so tired he could hardly flap his wings" in order for the monkeys and birds to have revenge on Mr and Mrs Twit. He saved the day again and again by his actions. So he's definitely not all talk and no feathers.
Then he offered to fly all the monkeys back home to Africa one by one on his back. He did all this while he was on holiday by Jove.

So we know what a loyal and honourable bird he is. He is physically strong and generous. He can be relied upon and is a steadfast bird. He has oodles of common sense and is intelligent. he's also well educated as he knows all the Latin names of his garden gifts. I think we can safely say that he would go to the ends of the earth to ensure his wife's happiness.

(So far he's shaping up as a stud muffin with heart don't you think?)

3. Can he sing?

Oh yes, in the book he writes and sings his own songs.
He sang to keep the birds from landing on the big dead tree and the monkeys cage.
He's planning to sing "Islands in the Stream" for his lady love.
He's pitch perfect don't cha know.

(He's a rock star in the birdie world.)

4.Can he deliver the goods?

Well in his basket from the garden he's got a Pheasant Berry bract (Leycesteria), Royal Purple Smoke bush leaves (Cotinus), Lady's Mantle flowers (Alchemilla mollis), a Tree Mallow flower (Lavatera), Weigela leaves, Clematis seed heads, Rosemary, Lavender, moss, twigs, pebble and the last two raspberries left in the garden!


If this little lot doesn't win her heart I don't know what will!

Who can resist the heroic Roly Poly Bird shaking his tale feathers and bearing gifts.
So Karen, what does she say, does he cut the mustard?

P.S.
I thought it would be so nice for me and my boys to go collecting in the garden together, a little mission and bit of family fun.
So far it sounds like an idyllic "family" thing to do?
Yes, well, this is how it played out for me.

Oldest son: "Do I have to? Can't I stay inside?"

Me. "Oh come on, what can we find in the garden that one bird could give to another bird who is nest building. You know, what sort of presents can we find?"

Youngest son: "How about some cheese?"

Doh!
The wonders of real family life...

P.P.S
If you were wondering, Spanky wants to do the ABAA Challenge - Bird in Hand - on her own.
Who am I to stand in the way of a professional Diva. :)


Sunday 12 July 2009

ABAA Dragonfly Challenge July 2009. Drag Dragonfly ATC Series

My heart sank this month with dragonflies being the theme, they really give me the Heebee Geebees, what with their googily compound eyes, segmented bodies and strange bums...

So I thought I need to use artistic licence (which I think is still available from the Post Office) and get rid of some of the bugginess in them.

Seeing as I'm no good at small pictures (but I want to be), I thought I'd try some ATC's because they really are a challenge for me. Based on photos of Emperor Dragonflies which have very nice wing shapes, I made an ATC sized template designed to be used with brads so the wings are moveable. I got rid of its head just like the Queen of Hearts said, and gave it a round one.
I had to widen the body to accommodate the wings and brads. I used the smallest brads I could find called mini circle brads. I drew a heart shape for it's bum (You can't beat a little bit of lovey dovey donuts unless it's shiny lovey dovey donuts).
But it still wasn't enough, I thought these need to be comedy ATC's to finally banish the bug.
Sorry to anyone out there who loves proper dragonflies......... look away now!

So here are my

Drag Dragonflies ATC's, a series of seven. I'm sorry but the photos I've taken do not do justice to their shinyness... click on them to show them bigger.

1. Albert Einstein contemplates the shape of Dragonflies bums and just how they fit into life, the universe and everything.


2. Terry Thomas is a magnificent man in his flying machine.


3. Captain Mainwaring gets blustery in florals.


4. Darth Vader
"You don't know the power of the dragonfly."


5. Ferdinand
shows us his shiny bits.


6. Marc Bolan
is the Dragonfly King.
(This one is for my husband)


7. Kate Bush
- Babooshka "To see if he, would fall for her incognito."


I had a brain fart making this one and put the top set of wings on upside down - duh!

I sooo wanted this outfit when I was a teenager................


I've done a template, all you need to do is left click it to make it bigger then right click it, save it to your computer using "save as" and print it out at A4. It hopefully will print the right size, at least it did for me when I tried it.
I suggest you print it onto card, cut the shapes out and use those as templates. Remember to cut inside the black lines so the pieces don't keep getting bigger and bigger.

Go on, you know you want to...

Please let me see what you come up with :)


Sunday 14 June 2009

ABAA Shell Challenge June 2009, Ferdinand's Flotsam and Jetsam Emporium

Hooray, all's well that ends well, Ferdinand is safe and well and living in Clacton on Sea!
Evangeline WILL be pleased!!!
His new Emporium and boundless charm are drawing the crowds like a magnet.
I'm sure all the Lady Birds will flock to see Ferdinand's shiny bits.
Click on the pictures to see them bigger.


I was so pleased when this months challenge was Shells, there is just something so elemental about shells and seaside paraphernalia that appeals to, and delights just about everyone isn't there?
I have wanted something like this since I was a girl, I don't live close to the sea any more and I do so miss it.
This started off life as a 1 kg tin of coffeemate.


How I made it.
After I cut out a panel, I wallpapered inside and outside with 12" card stock from DCWV Pocket full of Posies set (I just love this collection of designs and www.artymiss.co.uk have got it for £5 for a 48 sheet stack pack of12" card right now!)

I used Golden Heavy Gel (Matte) medium to glue the outside card on. It dries very fast, so glue and stick in small areas at a time. I used double sided tape to glue the inside card on. Start with a strip of tape down one edge of the card that will sit flush with the vertical opening , press the card on, then add another vertical strip to the card about three inches in and press down again and keep going all the way around. I wouldn't like to try and paper the inside of a round tin without double sided tape.

I wouldn't have attempted to make the shelves without foam board. Foam board is very light and I was able to use a couple of small foam pads to stick each shelf on the inside of the house. I first covered the foam board in another Pocket full of Posies card. I used Anita's tacky PVA glue to stick it on the foam board. To get the shelves to sit flush with the inside wall of the house I used the round floor template I had cut to make the inside floor of the house as a template to draw the curve at the back of the shelf, then cut out the shelf using a craft knife. I used a piece of string to measure the inside diameter of the house to cut the floor circle the right size and I also used string to measure the inside circumference of the house to cut the inside wall paper the right size.

The hardest part was trying to stick the shelves in. Two front facing eyes don't cut the mustard I'm afraid, but how many more eyes and where they would need to be positioned is a feat of engineering way beyond me. The result being slightly wonky shelves, but evolution was working against me.

I used Anita's 3D Clear Gloss finish to glue on all the contents of the shelves, the seed bead edging around the inside and opening of the house and all the beads and bling making the flowers around the outside of the house.

When trying to glue a line of bugle beads, seed beads or any little beads, it is much easier if you string them on some sewing thread first, then run a line of clear gloss along the line you want the beads to sit on. Then lay the string of beads along the line of glue. You can either pull out the thread after a minute or two or just trim the thread at each end of the line of beads.

The roof was made using pot pourri , that was already dyed turquoise and was some sort of seed head that stuck out on three sides to make the seed head shape. It looks like feathers and I'm really pleased with it. I cut a 12" diameter circle of card that was turquoise and cut a large pizza shaped triangle out of the circle and used double sided tape to make the cone shape stick together. Sticking the seed heads on would have been a nightmare of much cussing if I had used a tacky PVA glue mainly because it is messy and dries slowly, however Golden regular gel (Matte) medium was the perfect glue because it dries so quickly and isn't messy.

I haven't glued on the shells around the bottom of the outside of the house because by them being removable it will be easier to dust.
My high tech way of dusting this type of creation is to shut my eyes and blow (don't knock it , it works!).
Many of the shells are beach finds, some are bought ages ago and I used a lot of my old jewellery bits and pieces as well.


Linda (ABAA) inspired me to have a go at a twinchie with her lovely shells ones. So this is my first twinchie. I think it can sit on my computer at work as it is very apt at the moment in view of the current economic climate.


This was a backgound I painted with acrylics and edged with a brown chalk ink and used Anit's 3D clear gloss finish again to stick everything down. I'm always picking up weather worn limpet shells like this off my husband - no sorry- I meant beaches. The little face fell off one of my sons socks in the wash, in fact the whole pack of socks disintegrated in the wash very quickly. (Bad Matalan)


I have had a wonderful time visiting everyones blogs who have entered the challenge this month. So many talented happy crafters it's been great fun, thank you to everyone and especially to Rosie and Linda for running the challenges. :)