Welcome to the land of Shiny


The home of exuberant amateurism.

Saturday 24 October 2009

Spanky does Zetti Julia

So Spanky wanted to try her hand at Zetti, and I have to say I like Julia better this way, she's a sparkly shimmery hottie now, even if I do say so myself.

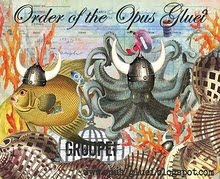
Do you think Spanky is the only stylist to use splendid gold rollers when setting hair?
I would image Posh Spice will require them when she reaches a certain age but right now, Julia is one spoilt unique lady.
Most of the time I wouldn't have the brass nerve to go out in public in rollers, but when the wind is in my fur, well anything is possible. :-)

Click on Julia to make her bigger. I don't think I would use this phrase if Julia was Julian.


How Spanky made her

Once again out came some DCWV Pocket full of Posies card for the background and all the extra bits. I cut out some patterned blue circles from another sheet of the same pack of card. I used Sakura stardust clear pen to add lots of sparkle to things. I also used a mini butterfly punch to punch out the mauve butterflies of yet another sheet.
I edged as much as I could with a white gelly pen to tie everything in together. I used DecoArt Rich Expresso metallic acrylic to paint her hair and then painted Splendid Gold (what a brilliant name) curls.
Her crown is a green size Woodware punch and edged in white gelly pen.
I drew her dress on watercolour card. Cut it out. Painted it acrylic Viridian Hue (which is a lovely mid green blue colour.)
Painted Ice Blue Glitz-it glitter glue over the top. For large areas I prefer using the big bottles of Glitz-it glue either by squeezing it out thick straight from the bottle (watercolour card is firm enough to cope with this) or by spreading it around with an old nylon bristle brush that I wash out straight away afterwards with washing up liquid. For little glitter details, blobs and thin lines you can't beat Ranger Stickles.
If you spread the glitter glue with a paint brush you don't get such a dense amount of glitter and you can therefore change the shade of the glitter glue by painting the background in different acrylic colours. (Watercolours won't work because the glue contains water that will reactivated the paint and smear it about unevenly, unless that is the effect you want.) You can achieve endless combinations of glitter colours this way with the same bottle of glitter glue.
I used a heart punch to decorate her dress, again white edging around each heart. Do the edging before you stick them on the picture. I used various round "jewels" stuck on with white PVA.
The black and white border is a black fine point Sharpie and white acrylic paint applied with a straight edge shader no. 3 paint brush. A straight edge shader brush gives you a straight line without even trying. A no. 4 works as well.
Julia's legs and arms are bugle beads. Thread them on some sewing cotton, lay a thin line of Anita's 3D Clear Gloss down and then lay the line of bugle beads on the top. Straighten the line up with two cocktails sticks one on either side of the line then remove the sticks. After a minute or two carefully pull the sewing thread out of the bugle beads and voila, sparkly limbs!
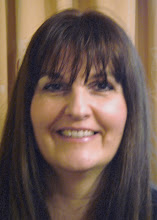
I ummed and ahhed whether or not to colour her face with make up, and chickened out in the end with the fear of spoiling the picture. I think I quite like the contrast.

I still find the massive head a bit creepy, but the shiny certainly lessens the squick factor a bit for me.

Happy Crafting everyone!

Gini

Friday 9 October 2009

Opus Gluei Challenge #27 Copy Cat

Well I've chosen Zetti style for my Copy Cat for the Opus Gluei challenge this week.

I've been too scared to try Zetti before, mainly because I get so upset when I mess up on a project. You don't get to sketch with pencil 'til you get it right; you just pick up a pen and go for it. {{{shudder}}}
You know when you "add" a bit extra or try something a bit different and then you want to cry 'cos you just ruined it!!!
And you have to go to bed to recover even if it's 10 in the morning and chocolate won't make it better. (Maybe some Nice n Spicy Nik Nak's when you get up though...)

But do you know what? I don't think you can mess up with this style, as it seems anything goes, and if in doubt, you just add some more to it, how excellent is that!

My internet connection was down when I was working on this so I wasn't able to research it and had to rely on my memory (Never a good idea).

What I could remember was lots of stripes particularly black and white, in borders and arms and legs, lots of doodling, people completely out of proportion in their bodies, lots of strange parts added to their bodies. I couldn't remember seeing any shiny, but overlooked that fact because Shiny Zetti works much better for me! Now that I've googled "Zettiology", I'm glad I didn't have the internet doing this, as I'd have been overwhelmed and probably stalled again.

Click on the image to make it bigger.


How I made her

She's a A6 card (roughly 6x4")

Background paper DCWV Pocket full of Posies 12" card stuck onto card with double sided tape.

The black marker is a fine tip Sharpie, which has me very impressed with it.
The white is white acrylic paint and also White Gelly Roll pen by Sakura or SourKraut if you can't remember but still need to have a stab at the name regardless :-)
The rest is Sakura Stardust pens which are great but the ink comes out quite fast so you can't hesitate or muck about dithering.
The finer flow Asda gelpens allow you to dither as much as you like. 25 for £2. I think you could buy three quarters of a Sakura pen for that money but I like having both :-)
I'm pretty sure I bought my posh work shoes in the sales and topped up on Sakura pens with the money saved. Maybe a similar justification will ease your conscience too?

The lovely lady is Julia, a Cherry Pie Stamp from the Julia Plate.
In this picture she is looking more like Nora Batty but Nora wore American Tan wrinkled round the ankles tights and my Julia is posh with her trendy stripy stockings.

Although I do think patterned tights looked horrible in the '80s and they look horrible in the 00's as well!
I'm too tall for tights, unless I fancy wearing the crotch around my knees, so in the '80s I wore stockings, but not being a morning person I would often go to work in mis matching stockings, and it wasn't just that the patterns were different, sometimes the colours were as well. Too much information? Probably.
Sheesh why can't fashion be flattering to a person?
Have they learned nothing from Spanky ;-)

Happy Crafting Everyone!
Gini
xx

P.S. I no longer do Fashion, I now do Comfy - but don't tell Spanky.

Wednesday 7 October 2009

Opus Gluei Challenge #26 Bling it on...

How could I possibly resist this challenge, everything I make could be entered here, apart from my last post in which I tried to make something without shiny, but couldn't quite manage it. :-)

So I have made the lady with no name and no story (gasp), she was stubbornly silent about herself, which I can only presume is because I was making her especially for a friend and I think she must be saving up her story for her predestined human and her new home!

Without flash so the detail can be seen.
Click on her images to make her bigger.


With flash so the shiny can be seen.


I made her in much the same way as Hoity Toity Kiora.


Happy Crafting Everyone!
Gini
xx

Saturday 3 October 2009

ABAA Challenge: Keys. September 2009. Cornflake Girl. Rabbit where'd ya put the keys girl?

The key thing is......... can you yodel as well as Tori Amos??

You mustn't sing this lyric, to get the full benefit of it you must yodel it with feeling.
Don't fret yourself now, as I promise, you will undoubtedly yodel better than me.

I love this song; Cornflake Girl by Tori Amos.
Especially once I had got over the whole "but, but she's doing Kate Bush, no, no! it's a KATE BUSH rip off" and then had a lie down in a darkened room for a little bit. :-)

I've wanted to do a picture based on this lyric for a good while now.
In preparation for this post I looked up the song lyrics on the web as they made absolutely no sense at all to me, even though I am word perfect in yodeling along; but of course.
I was still none the wiser having read and re read them.
Himself happened to mooch by, as is his way, and said "Oh that, she's talking about changing kiddy gangs in her childhood."
Cue the tumble weed rolling across my craft room floor (well, dining room really).
Yes! You're right my face did look just like that!
Then he smirked and admitted that he had read that somewhere.
Men gotta luv 'em. *cough*


This is a 12 x 12" picture. Click on it to make it bigger.


Can you find the two keys?


How I made it.


The background paper is one from DCWV Old World stack. Edged in brown chalk ink.
I used double sided tape (the strong bond one with the red backing) to stick the background paper to the cardboard.

I used the gorgeous My Mind's Eye 6x6" Bloom and Grow papers to make the trees that I drew.
The trunks are stuck to the foliage with white PVA.
Everything is stuck on the background with foam pads.

The big butterfly is a Debbie Moore clear stamp from a set of butterfly stamps which I think are rubbish quality (they are sticky as hell, rubbing over with a soft rubber doesn't help all that much and some of the stamps are uneven in thickness so it's almost impossible to get an even stamped image) however, the images are really nice which makes the quality issues such a shame. I stamped onto a DCWV pocket full of posies card. I used versafine vintage sepia ink to stamp the image and am so impressed with this ink pad, it's mighty fine to use. I stuck some gold bling gems on the wings with white PVA. The key is grungeboard (courtesy of the lovely ABAA Linda) and I painted it with Dark Bronze Cosmic shimmer watercolour paint. I had to have a little bit of shiny somewhere, I was getting the shiny withdrawal shakes really bad by this point.

The key in the tree trunk was painted with acrylics mixed up to match the patterned paper.

The little butterflies in the trees were some white embossed butterfly embellishments that came free with a cardmaking magazine. I painted them with cosmic shimmer in Dark Bronze, Tropic Yellow and Twinkling H20 Indian Copper. I tried to get the look of our British woodland butterflies.

Isn't the rabbit adorable? She is a Jo Kill design that she made for Papercraft Inspirations magazine Oct 2009, page 45 called Autumn Card Toppers. She designs wonderful animal cards and has done some fabulous ones throughout this year in the magazine.

I used some shiny embossed papers for the rabbit. There isn't a template for her in the magazine, the idea is that you use different sized round hole punches that of course I don't have.
But I made a set of circle templates out of 300g watercolour paper using a set of compasses. The trick to using a pair of compasses is firstly that your pencil is very sharp. You turn the paper not the compass to make the circle. If you want a very small circle you line the nib of the pencil up with the compass point so the pencil is shorter than the compass point. For a large circle line the pencil nib up so that it hangs lower (longer) than the compass point.
To cut without little jags, you never let the blades of the scissors cut right to the end of the blades. X-cut make scissors that deliberately won't cut to the end of the blades, so you can't do it by accident. Good on X-cut! And turn the paper not your scissors.
Thankfully I do have the right size circle punches for the eyes because cutting circles accurately that small would be torture.

The words are stamped by the individual wooden alphabet stamps made by Studio G which are excellent. I recently bought the same alphabet letters in clear stamps from Studio G which I think are awful, I can't get a decent stamp out of them not even after rubbing a soft rubber over the surface and then inking (I tried various different ink pads as well) which usually works with most clear stamps.
If I think it's rubbish I'm going to say I think it's rubbish, and yes I probably do sound a bit belligerent about this today but if your going to shell out good money for something then an honest review is surely a necessity, isn't it?

Happy crafting!
Gini