


My initial reaction was oh no! I'll never be able to do this one, my clothes are completely uninspiring as I have practically no interest in clothes for me to wear and well, let's just say it shows...
But I looked down at this anyway.

A boring T shirt but in a colour combination that I really like, fuchsia, lime green and white.
(Just in case you have got it into your mind that I am very very small - I'm not actually wearing it in this shot. Hey, it's just show biz baby.)
I had some scraps of K and Co stripy paper that I had just used on a card and it was just enough to make a background for an ATC.
I haven't made an ATC in months but I thought I would try but wasn't overly confident that I would make anything other than some bin material.
But miracle of miracles happened and I think all the weeks of studying and studying card layouts and trying to make layout cards is starting to pay off .
I sat down without a clue and within a few hours I had made this without any trouble at all and I actually like it!
I feel I've had a breakthrough moment in creating.
Click on it to make it bigger if you like.

It didn't stay ATC size though, it's 6" by 8".
How I made it.
For these light weight wall hangings I make the piece using layers of card and paper, then once I know what size it is going to be I mount it onto the same size of mount board.
Mount board won't warp or curl, is inexpensive and easy to cut if you use a steel ruler, cutting mat and a heavy duty craft knife. Make the cut in two goes. The first cut will go through most of the mount board and the second cut goes through the rest. If you try and cut it in one cut then you have to press so hard that you may get a wobble in your straight line and it hurts your wrist!
I usually use white PVA glue to do this sort of project and you don't need all that much to give a good bond. I run a reasonably thick line of glue around the edge and then draw squiggly lines of glue over the space left in the middle.
I try and remember to get it on mount board before I make the front too dimensional.
I used white PVA to glue down everything including the ric rac which I ran a line of glue along the ric rac and then stuck it down. I find this works better on ric rac than double sided tape does.
The stamp is an Elusive Image stamp and I stamped with stormy sky distress ink.
I glue on the sequin ribbon last and I use Anita's 3D clear gloss as a glue for this. My opinion is that Anita's used as a glue is stronger than Glossy Accents and as Anita's is a thinner liquid, it is often easier to use as a glue. However if you want to get a raised glossy finish, Glossy Accent wins hands down.
I run a line of glue down one side and put the sequin ribbon on.
Then I leave it for about 15 mins or longer in the winter to dry. Then I repeat this for the next side and leave that side to dry. I do this because it is very difficult to make the sequin ribbon go round the corner neatly if the first side isn't dry.
I use 20 gauge beading wire for the hanger. I thread the beads on the wire first then measure two points of equal distance from either side across the top of the back of the hanging. If it looks about the right amount of loop height I cut off the wire leaving about 2 inches extra on either side of the beads, then using a pair of jewellery pliers I twist over the wire just below where I want the beads to sit on the top of the frame.
I can't work wire for toffee but this way works even though it's neither posh nor proper wire working.
Then I use Scotch magic tape to tape down each end of the wire using my measured marks as a guide for where to stick them.
I am all for saving money when possible but the cheaper brands mimicking Scotch magic tape are in my opinion no good. You need to buy the real thing.
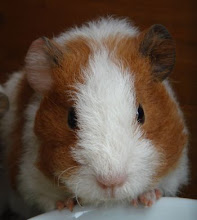
I wonder what Spanky would make if she looked down?
Happy creating!
Gini
xx


7 comments:
I can see the connection between t-shirt and wall-hanging, and how the colours and stripes inspired your masterpiece. You are so clever! The text stamp has created a perfect background, and I love all those shiny bits. Fabulous, as always - Love and hugs, Sylvia xx
This is FABULOUS. I love the colors in your shirt. Your art is a wonderful display of those colors. I love the keyhole image. All of these details are perfect. Thanks so much for not giving up on us at OPUS GLUEI.
Hi Gini, great colours.... like your hanging, especially the keyhole image. I'm getting to love ATCs and next I'm going to try an inchie for a bigger (smaller!!) challenge.
mmm...not too sure what Spanky would make tbh but I suspect that a bit of her wonderful fur would make a few tufty extesions for Evangeline!
Love what you have made here Gini...now what are you going to do with the rest of the t-shirt? HUGS XXX
Why doh't you ask her Gini? She's probably feeling miffed that she hasn't been asked!!
You have a break-tough moment each time you create. You just aren't paying attention. :-)
Wow! This is cool (had to chuckle, I first read ATC and then thought - my gosh, look at how involved that ATC is, she has fabulous eyesight and it's gorgeous!) It IS gorgeous, but now it is a size I can look at and say, oh, that's lovely and we're not making Gini squint (lol)!
This is great, you started off by selected s shirt that bridged the Poobahs' color faves (me - pink, Jana - green, esp. a lime/kiwi sort of green), and then you just made it so lovely and involved. I love the embellishments and extra touches you add - I need to do that more and take my projects to the next level (you do ALWAYS). I also appreciate that you provide a how to so that the craft challenged (yep, your Poobah is challenged) can try it out too!
BTW, where does one get this patience to allow their craft glue to dry in between steps. I read here that you waited 15 mins. That's an eternity to me when I'm in the zone, which is why most of my OG projects have wet glue still showing on them - ha ha!!!
Hugs and love this - really do, it's all girly and arty at the same time.
okay, must stop now, but I do thank you for participating with us!
What a tough challenge - I really wouldn't have know where to start first! You rose to it though with style! Your wall hanging looks fab - reminds me of one I have ;)
Post a Comment