
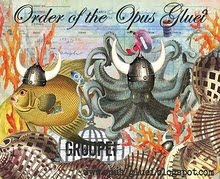


Evangeline WILL be pleased!!!
His new Emporium and boundless charm are drawing the crowds like a magnet.
I'm sure all the Lady Birds will flock to see Ferdinand's shiny bits.
Click on the pictures to see them bigger.
 I was so pleased when this months challenge was Shells, there is just something so elemental about shells and seaside paraphernalia that appeals to, and delights just about everyone isn't there?
I have wanted something like this since I was a girl, I don't live close to the sea any more and I do so miss it.
This started off life as a 1 kg tin of coffeemate.


How I made it.
After I cut out a panel, I wallpapered inside and outside with 12" card stock from DCWV Pocket full of Posies set (I just love this collection of designs and www.artymiss.co.uk have got it for £5 for a 48 sheet stack pack of12" card right now!)
I used Golden Heavy Gel (Matte) medium to glue the outside card on. It dries very fast, so glue and stick in small areas at a time. I used double sided tape to glue the inside card on. Start with a strip of tape down one edge of the card that will sit flush with the vertical opening , press the card on, then add another vertical strip to the card about three inches in and press down again and keep going all the way around. I wouldn't like to try and paper the inside of a round tin without double sided tape.
I wouldn't have attempted to make the shelves without foam board. Foam board is very light and I was able to use a couple of small foam pads to stick each shelf on the inside of the house. I first covered the foam board in another Pocket full of Posies card. I used Anita's tacky PVA glue to stick it on the foam board. To get the shelves to sit flush with the inside wall of the house I used the round floor template I had cut to make the inside floor of the house as a template to draw the curve at the back of the shelf, then cut out the shelf using a craft knife. I used a piece of string to measure the inside diameter of the house to cut the floor circle the right size and I also used string to measure the inside circumference of the house to cut the inside wall paper the right size.
The hardest part was trying to stick the shelves in. Two front facing eyes don't cut the mustard I'm afraid, but how many more eyes and where they would need to be positioned is a feat of engineering way beyond me. The result being slightly wonky shelves, but evolution was working against me.
I used Anita's 3D Clear Gloss finish to glue on all the contents of the shelves, the seed bead edging around the inside and opening of the house and all the beads and bling making the flowers around the outside of the house.
When trying to glue a line of bugle beads, seed beads or any little beads, it is much easier if you string them on some sewing thread first, then run a line of clear gloss along the line you want the beads to sit on. Then lay the string of beads along the line of glue. You can either pull out the thread after a minute or two or just trim the thread at each end of the line of beads.
The roof was made using pot pourri , that was already dyed turquoise and was some sort of seed head that stuck out on three sides to make the seed head shape. It looks like feathers and I'm really pleased with it. I cut a 12" diameter circle of card that was turquoise and cut a large pizza shaped triangle out of the circle and used double sided tape to make the cone shape stick together. Sticking the seed heads on would have been a nightmare of much cussing if I had used a tacky PVA glue mainly because it is messy and dries slowly, however Golden regular gel (Matte) medium was the perfect glue because it dries so quickly and isn't messy.
I haven't glued on the shells around the bottom of the outside of the house because by them being removable it will be easier to dust.
My high tech way of dusting this type of creation is to shut my eyes and blow (don't knock it , it works!).
Many of the shells are beach finds, some are bought ages ago and I used a lot of my old jewellery bits and pieces as well.
Linda (ABAA) inspired me to have a go at a twinchie with her lovely shells ones. So this is my first twinchie. I think it can sit on my computer at work as it is very apt at the moment in view of the current economic climate.

This was a backgound I painted with acrylics and edged with a brown chalk ink and used Anit's 3D clear gloss finish again to stick everything down. I'm always picking up weather worn limpet shells like this off my husband - no sorry- I meant beaches. The little face fell off one of my sons socks in the wash, in fact the whole pack of socks disintegrated in the wash very quickly. (Bad Matalan)
I have had a wonderful time visiting everyones blogs who have entered the challenge this month. So many talented happy crafters it's been great fun, thank you to everyone and especially to Rosie and Linda for running the challenges. :)


19 comments:
Oh Gini, Ferdinands Emporium is just perfect - I bet you had fun making it!
I love all the shelves with the tiny treasures displayed on them.
Now all it needs is a parrot, LOL!!!
Thanks for joining in with us again.
Hugs
Linda x
Wow Gini, this is stunning, how clever. Thank you so much for the fab way you explained how it was made. Those little shelves inside are amazing, wow you must have a steady hand and brilliant eyesight hehehe and lots of patience. I adore it , Well done Jaqi
This is wonderful, I especially love the little shelves inside! So cute and clever.
You have inspired me Gini - as someone who loves miniatures as well as altered art, this little shell house is absolutely perfect! I particularly like the roof. Thank you also for sharing the stage by stage construction - so many people really appreciate that. Great to have you with us in our challenge.
Love
Rosie ABAA
This is so beautiful!!! Love all the tiny details!
Ooooh! This is great.....very imaginative....thanks for popping in to my blog and thanks very much for the info re H2O's/Cosmic Shimmer.
xoxo
WOW WOW WOW WOW that is just amazing!!!! Thank you so much for the how-to's as well XXX
What a perfectly lovely creation! The shells on shelves, every detail is so sweet!
Thank you for the really lovely comments Gini XXX
hahahahaha now why didn't I think of puting a chat line with the birds...would have been much better!!! If you come up with one let me know XXX
Hi Gini,
Thanks for your comment, she was indeed waiting for the merman!
If only!
I really like your idea, it's very different and good that we hear what happened to Ferdinand!! :)
Annie
Oh Gini - this project is fabulous - words fail me (and that doesn't often happen)!! Thank you so much for your kind message which was very inspirational. You have prompted me to come up with something for the Dragonfly challenge - I will have a go next week after our short break in Keswick (a birthday treat)! One window is now installed (hence the access to my beloved computer & craft desk)- one more window to go.
Thank you once again for getting in touch - you are so kind.
Best wishes, Sylvia xxx
Hi Gini
An easy mistake to make due to the name of my Blog - Poppy is actually my youngest granddaughter's name, so I don't mind at all - I've been called far worse things in my time!!
Thank you for the birthday wishes too - have a sunny weekend.
Love, Sylvia xxx
Hi again Gini - I forgot to ask you -how do we become a Follower of yours? Couldn't find the "following" thingy on your blog! By the way - I love the sense of humour woven into your posts!!
Hugs, Sylvia xxx
This is just fab!! I love it, all the little details mean you see more each time you look at it!
So sorry, I must have missed this post when the Shell Challenge was on, you have some beautiful creations here :)
Gini- I am so sorry that I didn't compliment you on this when I first saw Ferdinand's F & G Emporium. So creative, and I wish that I could shop there! Christen
Whoa !!!! Awesome !!!
You're really clever and talented.
I really love to live inside :)
Love your shell house Gini! The roof really does look like it's covered with feathers. I love your tip about stringing up the beads first before glueing. They look really pretty as flowers on the outside. A real piece of altered art!
I. LOVE. THIS. SHELL. HOUSE. And I think I am going to have to make one just like it this weekend. Because I want to.
Post a Comment